Google Tag Manager (GTM) Analytics: What Are Your Options?
Marketing teams often need to put pieces of code on the website. Using website analytics tools to collect, process, configure, and report website and mobile apps is not new; a pixel here, a tracking code here. However, co-ordinating with the developers for these needs can be super challenging. Google Tag Manager (GTM) emerges as a powerful solution to simplify the process.
This application not only provides marketers with a user-friendly interface that walks you through creating tags step-by-step, eliminating the need to have extensive experience with JavaScript, but also combines and organizes the multiple code snippets required for various actions, such as tracking page views and measuring conversion actions, in one place, removing any manual effort needed in the process. The tags are triggered from within the GTM application instead of your website. This allows marketers to take tagging into their own hands and steer tracking however they may desire, quickly and easily, without the help of developers.
Google Tag Manager has essentially made analytics much easier, and in this blog, provide you with a brief understanding of Google Tag Manager, how it helps you connect your analytics tool to your website, and how it works in combination with Google Analytics (and other analytics tool) to help marketers gain valuable insights into their website’s performance.
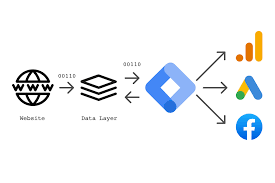
Image: Marc IT
What is Google Tag Manager (GTM)?
According to Google —
“Google Tag Manager is a tag management system (TMS) that allows you to quickly and easily update measurement codes and related code fragments collectively known as tags on your website or mobile app.”
Once you add the brief section of Tag Manager code to your project, you can safely and easily deploy measurement tag configurations and analytics using any web-based user interface. How does it work?
Once you deploy Google Tag Manager, your website or app can communicate with the Tag Manager servers. Following this, you can build variables that can be used to streamline and automate your tag setups and establish triggers that cause your tag to fire when specific events occur, all using GTM’s web-based user interface.
In short, GTM allows you to install, manage, and store marketing tags that track user actions and collect data without modifying the website’s existing code.
For instance, while you may want to install the Google tag, which allows applications like Google Analytics and other Google products and services to track and collect data from your website, there is a risk of losing or breaking the tag (or other website elements) every time there is a code change.
Google Tag Manager resolves these issues by enabling you to insert marketing code snippets from within its software instead of into the website code. The tool acts as an intermediate and deploys snippets or make changes while preventing you from breaking your website while testing something.
How Does Google Tag Manager (GTM) Help Connect Your Analytics Tool to Your Website?
To use Google Tag Manager, you simply need to add a single JavaScript code snippet to your website, which will serve as a container for all the tags you wish to manage. A container is essentially an assortment of tags, triggers, variables, and related configurations installed on a given website or mobile app. This acts like a listener, picking up on user activity, like page views.
The GTM listeners notice when a user loads a page. Next, they see if the action corresponds with any of the GTM-configured triggers. The related tag is fired if the interaction meets a trigger. This tag might be a little piece of code for a marketing tool, like Google Analytics or your own analytics tool.
In contrast, if you wish to monitor a particular occurrence (like views on a particular page), you can simply inject the code into the webpage by firing the tag. Following that, the tag processes the relevant data and forwards it to the appropriate third-party service, i.e., the analytics tool you use.
In other words, GTM doesn’t inject or execute a tag until a user initiates one. This lowers the possibility of implementation problems and decreases the total amount of code on a website. There are two more GTM components (variables and triggers) that are necessary for it to work. They help GTM choose the appropriate time to run the code snippets.
Let’s give you a brief concept of the three components of GTM.
Tags are small snippets of code used by platforms for marketing, analytics, and customer service to interface with websites and applications. They function similarly to website observers, monitoring user actions, such as clicking links and viewing websites. Tags also transmit this data to your third-party analytics tool, like Facebook Pixel or Google Analytics.
Examples of tags include Google Ads, Google Analytics, Salespanel, and more.
Triggers
Triggers are actions and standards that specify when tags should go off. Triggers include things like link clicks, form submissions, and page views. The related tag will activate when a user navigates across a page or clicks a link.
Each tag needs to have at least one trigger so that GTM understands when to fire the tag. Page views are commonly triggered in analytics platforms such as Google Analytics. Other examples of triggers include form submissions, button clicks, file downloads, scroll depth, time spent on a page, or some other custom event.
The reason for this is that you need analytics information from each page a user views. As an alternative, you may want a conversion tracking tag to activate just in response to a user adding an item to their cart or even after they’ve finished the checkout procedure.
Each tag has a trigger that instructs it to activate when the designated event takes place. Without you pre-setting these criteria, the trigger will not fire, and GTM cannot run the code sample. In order to better define when you want tags to fire, triggers can also have variables added to them, which we will discuss in the next section.
Note: A single tag can have more than one trigger.
Variables
Variables are additional pieces of code snippet that specify exactly what the GTM tag or trigger is supposed to do once fired.
Examples of frequent variable types are “Google Analytics Settings” and “Constant.” The Google Analytics account IDs (also known as the “Tracking ID” in Universal Analytics and the “Measurement ID” or “Google Tag” in GA4) are normally defined using both of them.
It can get cumbersome to input your tracking or measurement ID whenever you add a Google Analytics tag. In this case, making a variable that stores your ID information makes a lot of sense. Once you create the variable, all you have to do is attach the newly generated variable to any new tag that needs this data.
Other examples of variables include form ID, click URL, page URL, page path, click class, scroll depth threshold, etc.
Google Tag Manager, thus, serves as a centralized platform, allowing marketers and website administrators to deploy and update tags, including those for analytics tools, without directly changing the site’s code. This makes tag management much more effective and adaptable and guarantees reliable data gathering and analysis.
GTM further provides a user-friendly interface that allows users to add, edit, or remove tags through a web-based platform. It also enables version control, allowing users to review, compare, and restore previous configurations. Besides this, Google Tag Manager event tracking, dynamic tag management, and seamless tracking of user interactions across different domains within a single analytics account.
While you can use any analytics tool with GTM, most marketers use it in combination with Google Analytics. In the following section, we will discuss how you can connect your GTM account to Google Analytics (now GA4).
How Can You Connect Google Tag Manager To Google Analytics?
If you run your a huge chunk of your marketing operations on Google’s platform, your first choice for an analytics tool to connect with GTM will probably be Google Analytics.
Before Google Tag Manager came into the picture, you would have had to wrestle with your JavaScript code whenever you wanted to track user interaction. However, now you can combine several script tags for tracking page views and user behavioral data while keeping pageload speed unaffected.
Neat, isn’t it?
So, how does Google Analytics connect with GTM?
To get started, you would first have to create a Google Tag Manager account. Once that is done, you can move forward and create a GTM tag. This new tag will monitor every page view on your website and send you all data reports that are accessible through Google Analytics. You may adjust your marketing plan and gain insight into the functionality of your website with the aid of analytics data.
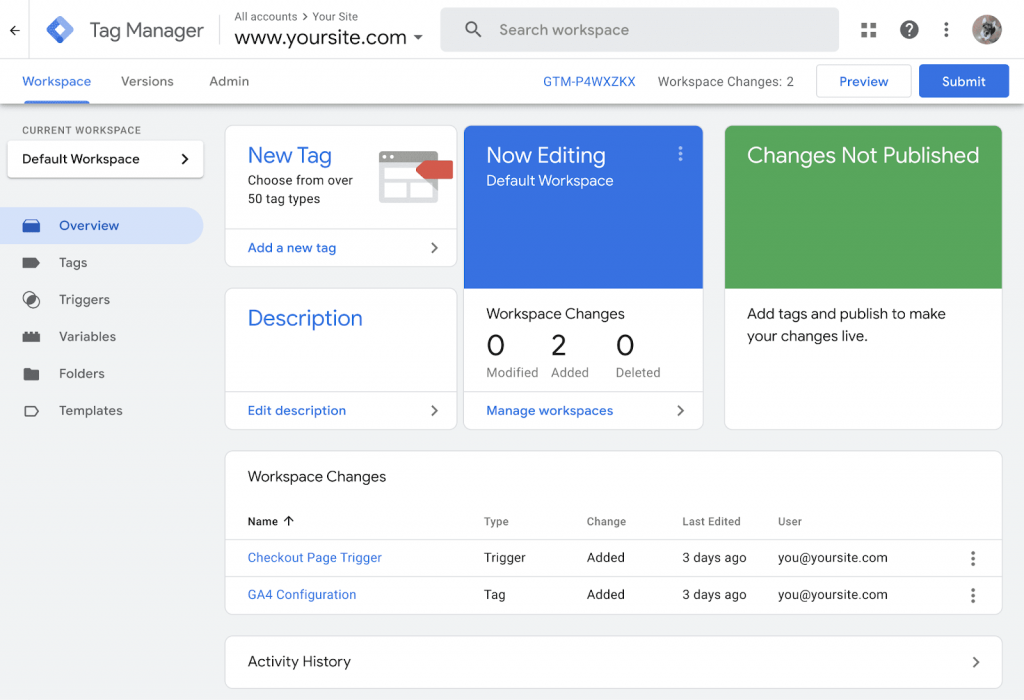
Image Source: Semrush
Now, let’s understand how you can link your Google Tag Manager account to your Google Analytics (now GA4) account.
From your GTM account create a new tag. Here are the steps involved.
- Open Google Tag Manager.
- Select the container you want to configure. Open the Tags menu.
- Make a New tag and give it a name (e.g., “Google tag configuration — example.com”).
- In the Tag Configuration box, select Google tag.
- Select a tag type, for example, the “Google Analytics: Universal Analytics.”
- Choose a track type, for example, page view.
- Insert a Settings Variable: You can create a “New Variable” from the drop-down menu by entering your
- Google Analytics Property View Tracking ID. If you are using this workspace to track just one website, leave Cookie Domain set to auto. Once you name your variable, click on “Save.” In the field Tag ID, enter your Google tag ID.
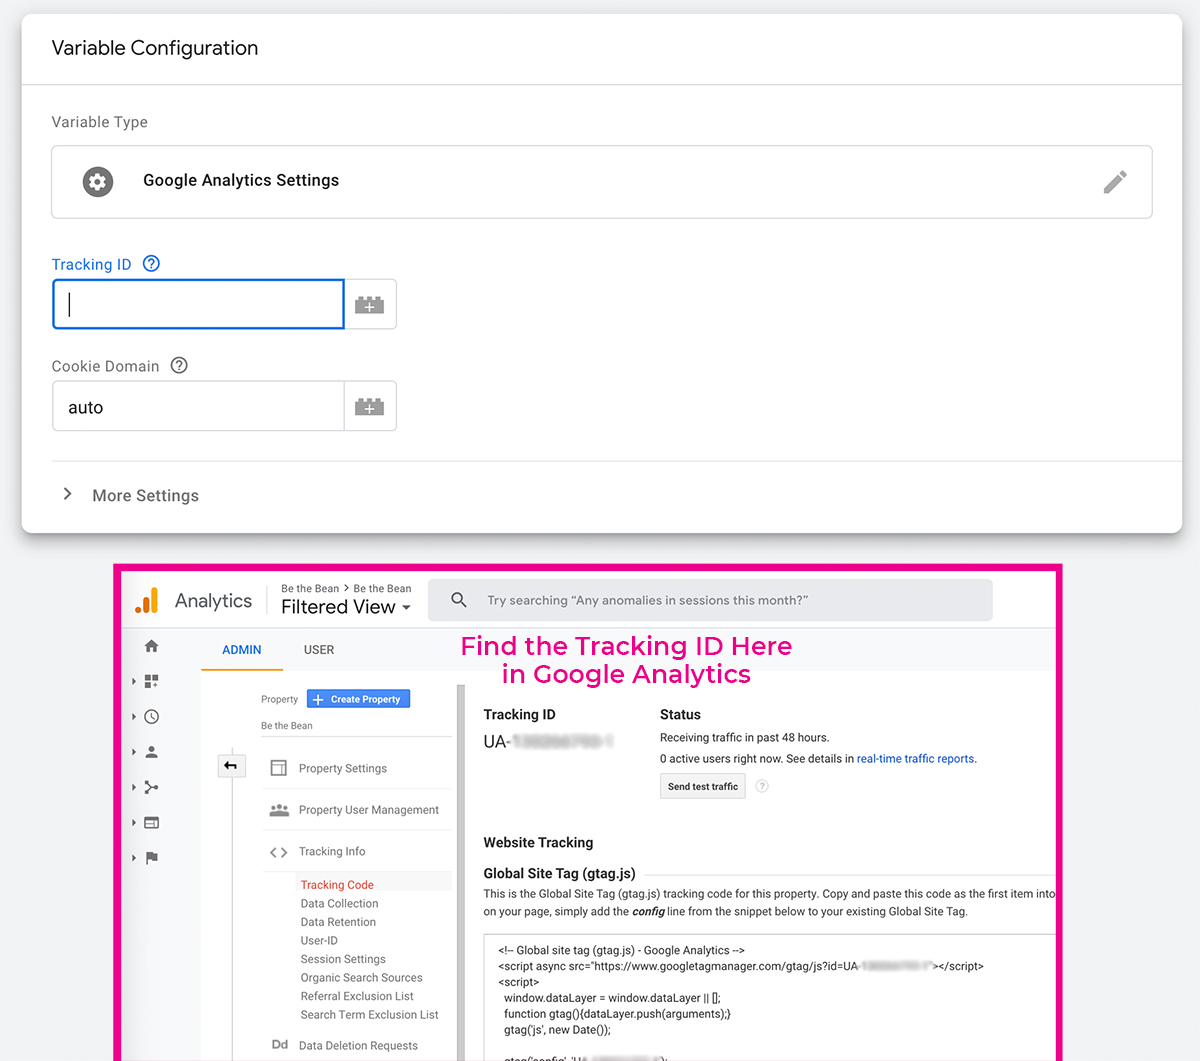
Image Source: Be The Bean
Next, you need to create a trigger. This will load the Google tag when someone clicks on your website. Here are the steps involved:
- Click Triggering and use the Initialization – All Pages Trigger to make sure the Google tag fires before other triggers.
- Label the tag and store the configuration of the tag.
Last but not least, you must verify if your tag works. Here are the steps involved:
- In your Workspace, click Preview. Tag Assistant opens.
- Once Tag Assistant opens, enter your site’s URL.
- Check if the Google Analytics: GA4 Configuration fired when the page loaded.
- If your tag fired successfully, the Tag Assistant UI look like this:
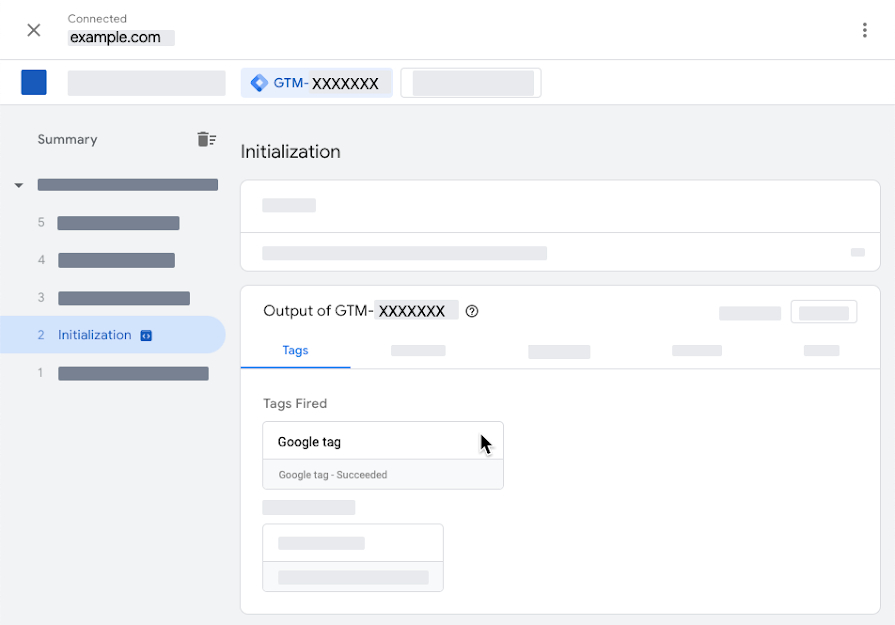
- If your tag didn’t fire, check your tag’s trigger settings.
- If your tag fired successfully, the Tag Assistant UI look like this:
- Debug your tag and close Preview mode.
- Click Submit to publish your changes in your workspace.
Now that your Tag Manager container may connect to your Google Analytics property, you can easily add your event tags and track user behavior on your website.
While Google Analytics is the go-to choice for analytics for GTM, this doesn’t mean there are no drawbacks to this combination.
For starters, dependency solely Google services can impact data collection and reporting for your website if there are any issues with Google. Remember when Google Analytics got banned in several EU countries? Google Analytics has a long history of struggle with GDPR complicance and this might raise concerns regarding privacy and data ownership if you are using GA4 to extract and store data.
Plus, Google Analytics does analytics on a statistical level and this is great for B2C companies. However, B2B companies, because of lower volume and higher ticket sizes, need data that directly connects to accounts and customers. With Google Analytics, you can’t tell which lead did what! The tool generally applies data sampling when dealing with large datasets. This means that for extensive reports, the data presented might be an estimate rather than the complete dataset, which could impact the accuracy of your analysis.
If you are a B2B business, you might consider trying out Salespanel.
Get B2B Analytics Using GTM with Salespanel
What is Salespanel?
Salespanel is a B2B visitor intelligence and marketing analytics solution, specifically designed for B2B companies that need to track inbound accounts or visitors at an individual level. This tool goes above and beyond typical analytics, by linking visitor data from your website to customer data, enhancing your understanding of buyer intent.
The tool starts by identifying accounts from your website (with industry leading match rates) even when a visitor hasn’t signed up yet! When a visitor provides his contact information (by signing up, booking a demo, or starting live chat), Salespanel automatically captures the lead and continues tracking the rest of the customer journey.
Our product recognizes that B2B sales often involve multiple stakeholders from an organization and that these sales cycles can be long and complex. This is why it offers real-time visitor-level tracking that allows you to track and analyze the behavior of specific visitors on your website. Such granular insights are crucial for qualifying and nurturing inbound leads. Salespanel also enables sales reps to understand what a lead or account is actually looking for, enhancing their ability to offer a personalized and effective sales approach.
By connecting Google Tag Manager with Salespanel, you can monitor the customer journey through user interactions on your website and make data-driven choices regarding nurturing and conversion. It is particularly useful for sales teams that want to quickly obtain visitor-level insights and use the information to better understand customer behavior and buy intent.
How Does Salespanel Connect with GTM To Help with B2B Analytics?
To integrate Salespanel as your chosen analytics tool with Google Tag Manager, you simply need to install Salespanel’s tracking code using Google Tag Manager:
- Go to the Install Tracking Code page.
- Copy the JS code snippet by clicking on the Copy Code button.
- Go to Google Tag Manager workspace.
- Add a New Tag and proceed to edit the Tag Configuration section.
- Select custom HTML for Tag Type.
- Paste the tracking code in the editor and make sure to select Support document.write checkbox.
- In the Triggering section, select All Pages.
- Submit and publish the changes.
That’s it! Now, you can track all website actions, including page views, scroll depth, and time spent on page with Salespanel, and figure out which of your website visitors and prospective buyers!
Final Thoughts
If you are a Google loyalist, Google Tag Manager is a handy tool to track KPIs in combination with Google Analytics. It is perfect for statistical analytics and tracking but the question is — in today’s competitive B2B business environment, is audience-level tracking enough? Sadly, it may not be so. This is where you can try out an alternative like Salespanel.
Sell more, understand your customers’ journey for free!
Sales and Marketing teams spend millions of dollars to bring visitors to your website. But do you track your customer’s journey? Do you know who buys and why?
Around 8% of your website traffic will sign up on your lead forms. What happens to the other 92% of your traffic? Can you identify your visiting accounts? Can you engage and retarget your qualified visitors even if they are not identified?